Modular structure of Apache prefork tuning is one of the reason for its global dominance among webservers.We have the flexibility to adding or droping modules.Before
Read more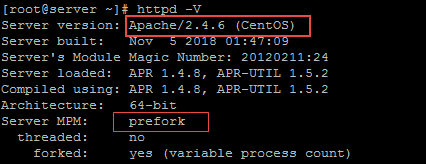
Modular structure of Apache prefork tuning is one of the reason for its global dominance among webservers.We have the flexibility to adding or droping modules.Before
Read more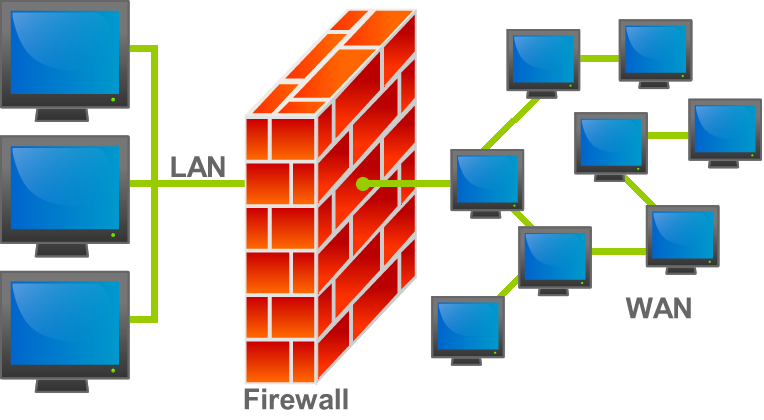
Iptables is the default firewall used in many present Linux distros. It is a project under netfilter. Previously it was known as ipchains (For 2.2
Read more
Introduction to Git access There are many open source version control systems like Bazaar, Arch, Aegis, SVN ,CVS , Git etc. All systems have there
Read more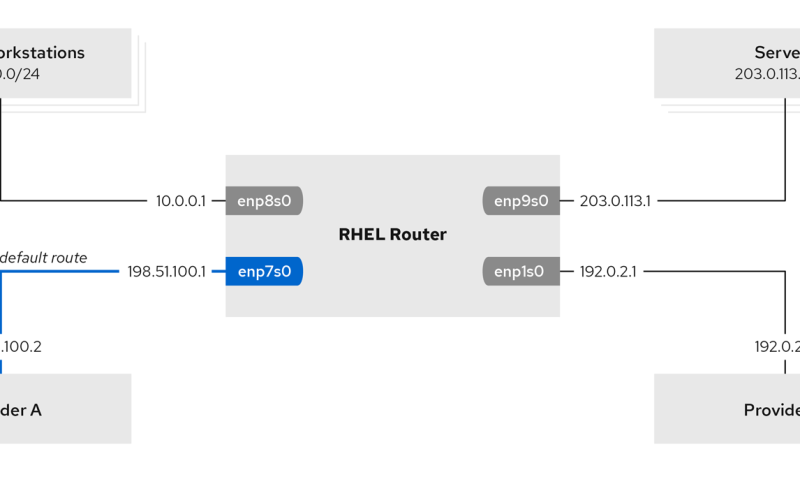
Routing In Linux An Introduction By default, routing is based on destination IP address, i.e., the routing table will decide where to route the packet
Read more