Nginx (pronounced as Engine-x) is a high performance web server,reverse proxy, mail proxy server which was originally written by Igor Sysoev in 2005. Here we discuss about setting up a very basic Installing Nginx web server on your Linux server , capable of parsing php pages.
Installing Nginx on your Linux server
Installing nginx on your Linux server is very simple and even on the first try itself, you will not face any difficulties.
The steps that i have followed on my first nginx installation are given bellow (of course with the help of others tutorials and other resources available from net)
[bash]
#(Change directory to /usr/local/src [ its a good practice to download and compile software’s from /usr/local/src ] )
cd /usr/local/src
#(download nginx source from “nginx.org”)
wget http://nginx.org/download/nginx-0.8.33.tar.gz
#(Extract the source file )
tar -xzf nginx-0.8.33.tar.gz
cd nginx-0.8.33
#Now configure Nginx , here we are using the 2 basic configuration options
[ –sbin-path=/usr/local/sbin #the nginx binary path ]
[ –with-http_ssl_module #Enables https module ]
./configure –sbin-path=/usr/local/sbin –with-http_ssl_module
[/bash]
since you have included the –with-http_ssl_module there is a possibility of getting the following error ( at least i got this error on a fresh centos machine since no pcre libraries were pre-installed on the system)
[text]
checking for PCRE library in /usr/include/pcre/ … not found
checking for PCRE library in /usr/pkg/ … not found
checking for PCRE library in /opt/local/ … not found
./configure: error: the HTTP rewrite module requires the PCRE library.
You can either disable the module by using –without-http_rewrite_module
option, or install the PCRE library into the system, or build the PCRE library
statically from the source with nginx by using –with-pcre=
option.
[/text]
If you get the above error while configuring nginx , please download pcre (Perl Compatible Regular Expressions) from “http://www.pcre.org/” and change the nginx configure command as given bellow
[bash]
cd /usr/local/src
#(Download the pcre source file)
wget ftp://ftp.csx.cam.ac.uk/pub/software/programming/pcre/pcre-7.9.tar.bz2
#(extract the file)
tar -xjf pcre-7.9.tar.bz2
cd /usr/local/src/nginx-0.8.33
[/bash]
Now configure nginx again with the following configuration options
[bash]
./configure –sbin-path=/usr/local/sbin –with-http_ssl_module –with-pcre=/usr/local/src/pcre-7.9
[/bash]
The nginx configuration should now be completed with out any errors, now install nginx
[bash]
make
make install
[/bash]
Nginx is now installed on your machine and you can start the nginx process using the
[bash]
#[ usually nginx will be started automatically at this stage]
/usr/local/sbin/nginx
[/bash]
and to stop nginx , you can use the following command
[bash]
pkill -9 nginx
[/bash]
If you want to use a daemon for starting and stopping nginx like we are doing in apache , please copy the following script and save this as “/etc/init.d/nginx
[bash]
!/bin/sh
# nginx – this script starts and stops the nginx daemin
#chkconfig: – 85 15
#description: Nginx is an HTTP(S) server, HTTP(S) reverse \
proxy and IMAP/POP3 proxy server
#processname: nginx
#config: /usr/local/nginx/conf/nginx.conf
#pidfile: /usr/local/nginx/logs/nginx.pid
#Source function library.
. /etc/rc.d/init.d/functions
#Source networking configuration.
. /etc/sysconfig/network
#Check that networking is up.
[ “$NETWORKING” = “no” ] && exit 0
nginx=”/usr/local/sbin/nginx”
prog=$(basename $nginx)
NGINX_CONF_FILE=”/usr/local/nginx/conf/nginx.conf”
lockfile=/var/lock/subsys/nginx
start() {
[ -x $nginx ] || exit 5
[ -f $NGINX_CONF_FILE ] || exit 6
echo -n $”Starting $prog: ”
daemon $nginx -c $NGINX_CONF_FILE
retval=$?
echo
[ $retval -eq 0 ] && touch $lockfile
return $retval
}
stop() {
echo -n $”Stopping $prog: ”
killproc $prog -QUIT
retval=$?
echo
[ $retval -eq 0 ] && rm -f $lockfile
return $retval
}
restart() {
configtest || return $?
stop
start
}
reload() {
configtest || return $?
echo -n $”Reloading $prog: ”
killproc $nginx -HUP
RETVAL=$?
echo
}
force_reload() {
restart
}
configtest() {
$nginx -t -c $NGINX_CONF_FILE
}
rh_status() {
status $prog
}
rh_status_q() {
rh_status >/dev/null 2>&1
}
case “$1″ in
start)
rh_status_q && exit 0
$1
;;
stop)
rh_status_q || exit 0
$1
;;
restart|configtest)
$1
;;
reload)
rh_status_q || exit 7
$1
;;
force-reload)
force_reload
;;
status)
rh_status
;;
condrestart|try-restart)
rh_status_q || exit 0
;;
*)
echo $”Usage: $0
{start|stop|status|restart|condrestart|try-restart|reload|force-reload|configtest}”
exit 2
esac
[/bash]
You can also download the above script from our server using the following method
[bash]
wget http://www.sparksupport.com/nginx/startupscript.txt -O /etc/init.d/nginx
[/bash]
Which will download the file from our server and will save it to /etc/init.d/nginx
Change the file permission to 755
[bash]
chmod 755 /etc/init.d/nginx
[/bash]
Now you can use the downloaded and Installing Nginx daemon script to start and stop nginx server
[bash]
/etc/init.d/nginx start ( To start the web server)
/etc/init.d/nginx stop ( To stop the web server)
[/bash]
Now if you enter your server ip on the browser , you will see a page, which is the default page for nginx

Now you need the nginx to parse php pages so that you can host your php pages on this nginx server ,for that we need to install a fastcgi process manager on our server
PHP-FPM
The typical nginx configuration involves using spawn-fcgi from the Lighttpd project to get nginx serving up PHP. There are a few issues with spawn-fcg like the spawn-fcgi hangs after a few hours. So here we will use the php-fpm (php fastcgi process manager) which is actually a set of patches to php for an alternative fastcgi-process manager which can be safely used in busy sites with out having the fear of hang issues or crash issues.
More details about php-fpm can be found on “http://php-fpm.org/”
Installing PHP-FPM
Download the php source from “http://php.net”
[bash]
cd /usr/local/src
wget http://museum.php.net/php5/php-5.2.8.tar.bz2 [here we are using php-5.2.8 , if you want to use higher versions of php , then you need to use the corresponding php-fpm version]
tar -xjf php-5.2.8.tar.bz2
Download the php-fpm package from “http://php-fpm.org/”
wget http://php-fpm.org/downloads/php-5.2.8-fpm-0.5.10.diff.gz
gzip -cd php-5.2.8-fpm-0.5.10.diff.gz | sudo patch -d php-5.2.8 -p1 ( patching the php
source )
cd php-5.2.8
configuring php
./configure –enable-fastcgi –enable-fpm –with-mcrypt –enable-mbstring –with-
mysql=/usr/include /mysql –with-mysql-sock=/tmp/mysql.sock –with-curl –with-sockets –with-gd –with-zlib –with-iconv –with-jpeg-dir=/usr/lib
make
make install
[/bash]
Now open the php-fpm.conf in your favourite text editior (here we use vi)
[bash]
vi /usr/local/etc/php-fpm.conf
[/bash]
Search for “Unix group of processes” and ” Unix user of processes” and add the user nobody as given bellow [by default nobody will be the user and group given in the conf, and you will only be required to un comment the following lines on the conf]
[bash]
Unix user of processes
nobody
Unix group of processes
nobody
[/bash]
please note that the nobody user is the nginx user mentioned in your nginx conf , please refer your nginx conf to verify this now go to your nginx default document root
[bash]
cd /usr/local/nginx/html
[/bash]
now please create a phpinfo( ) page and save it as index.php
now open the nginx.conf and add these lines to the configuration
[bash]
location ~ \.php$ {
root /usr/local/nginx/html; # The directory on which the php pages are placed
fastcgi_pass 127.0.0.1:9000;
fastcgi_index index.php;
fastcgi_param SCRIPT_FILENAME /usr/local/nginx/html$fastcgi_script_name;
include fastcgi_params;
}
[/bash]
Usually the above lines will be present in the nginx conf by default itself, you just need to un comment the above lines from your nginx conf .Also if you get a “NO INPUT” message on the browser , please make sure that the path given in the nginx conf(/usr/local/nginx/html), are correct. That is on the following 2 lines
[bash]
root /usr/local/nginx/html;
fastcgi_param SCRIPT_FILENAME /usr/local/nginx/html$fastcgi_script_name
[/bash]
now restart nginx and start php-fpm
[bash]
/etc/init.d/nginx restart
php-fpm start
[/bash]
you can verify that your php-fpm is running by the following netstat command
[bash]
netstat -pant |grep 9000 //the php-fpm runs on the port 9000 and from the nginx we transfer the request to this port internally
[/bash]
Now enter your ipaddres/index.php on your browser
[bash]
http://your-ip-address/index.php
please replace your-ip-address with your ip address
[/bash]
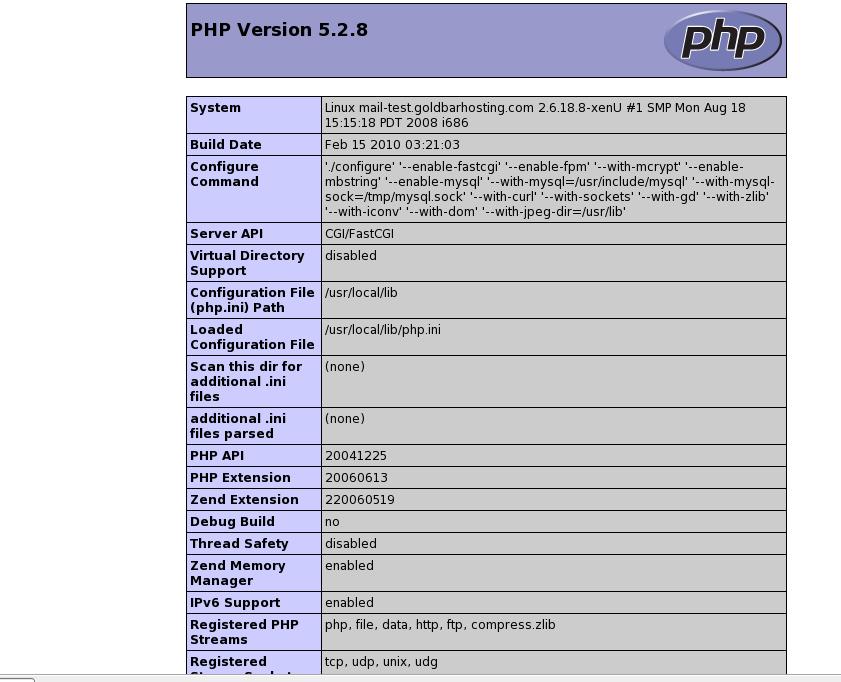
which will show the php info page like the one given bellow.
By following the above steps you will be able to setup a basic Installing Nginx web server that is capable of parsing php pages within few minutes
If you face any difficulties in setting up an nginx server using the above methods , please let us know that