What is FBL(Email Feedback Loop) Usually when users do not want to receive any more mails from an email account they just click the “report
Read more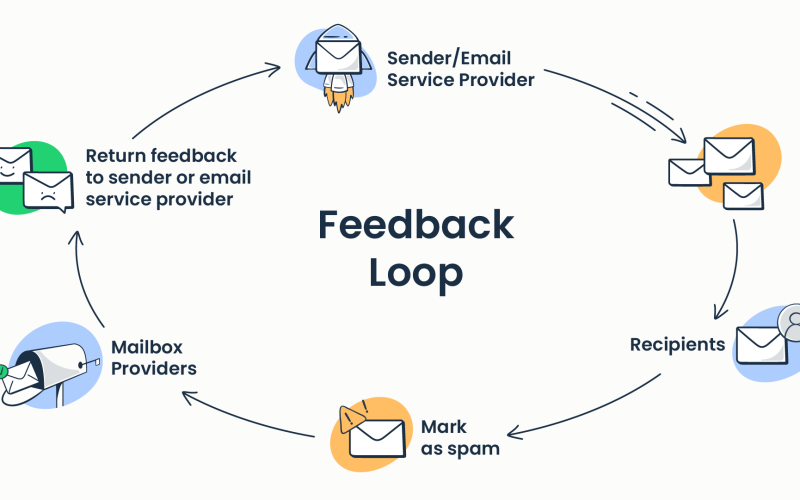
What is FBL(Email Feedback Loop) Usually when users do not want to receive any more mails from an email account they just click the “report
Read more
Qmail is a wonderful MTA in all sense but its quite easy to have the troubles like your queue getting filled up and you don’t
Read more